THE BACKGROUND OF SOURDOUGH
Did you know that if you don't have yeast at home and you want to make your own bread, you can essentially make your own "yeast" to get your bread to rise? Because I'm going to be honest, I didn't know that was a thing until starting this experiment and doing more research into exactly what sourdough and a starter is. If I had known just a few months ago, then I definitely would've tried to experiment with it (and the process of making my own bread) sooner.
Nonetheless, I'm really excited to experiment with sourdough for my genetics lab (and I've GENUINELY never been more excited about a lab before). I was definitely a little worried with how labs were going to work out this semester, considering all of mine are now online. However, after I figured out what was going to be going down with my genetics lab, I felt wayyyy less stressed out and I was happy to learn that we'd still be getting hands-on experience and it'd be something we could do in our own kitchens.
Now, before I explain exactly what ingredients I used and how I went about starting my starter, it's important to understand what sourdough is.
So, what is sourdough?
Well, according to The Public Science Lab, "sourdough is naturally leavened bread, which means it doesn't use commercial yeast to rise." So, like I said at the beginning of this blog, it's a type of bread you can make with a starter, which most likely contains ingredients you can find around your own house. Now, this may leave you wondering...
what exactly IS a starter?
Also, according to The Public Science Lab, it is "a fermented flour and water mixture that contains wild yeast and good bacteria." This means that if you have flour and water lying around your house (or in your faucet), then you have the ingredients to make your own starter! If you're even more interested in the science of the sourdough starters, you may also be curious to know...
what microbes are usually found in sourdough?
After doing some research, I found that the main microbes that exist in sourdough starters are yeasts and lactic acid bacteria. Now that you know more about what exactly sourdough and a sourdough starters are, I can hop into how I went about starting my experiment.
MY EXPERIMENT
If I'm being honest, I started my experiment a little later in the week then I initially anticipated, so I don't have too much data as of now. But, on Friday, August 28th, 2020 at 9:14 PM, I began my sourdough starters.
My three starters are:
1.) Control 1 - this starter simply contains two scoops of flour and two scoops of dechlorinated water, which is simply just tap water that's left out for 24 hours.
2.) Peach 1.1 - this starter contains two scoops of flour, two scoops of dechlorinated water, and one scoop of peach.
The peach I used for this starter came from the State Farmers Market in Raleigh, NC. I don't remember exactly which stand I bought it from, but I had to buy it in a bulk of five, so I used the rest of the peaches to make a delicious peach cobbler. However, the peach I used in this experiment has been sitting in my cabinet since last Saturday (August 22nd, 2020), so its gotten a little soft over the past week.
Just peachy - As seen in the picture, I wasn't as gentle with my peach as I probably could have been. But that's okay, my roommate still took the rest of the peach to eat with her pancakes anyways.
A scoop of peach - I packed each of my fruits as tightly as I could into my tiny scoop.
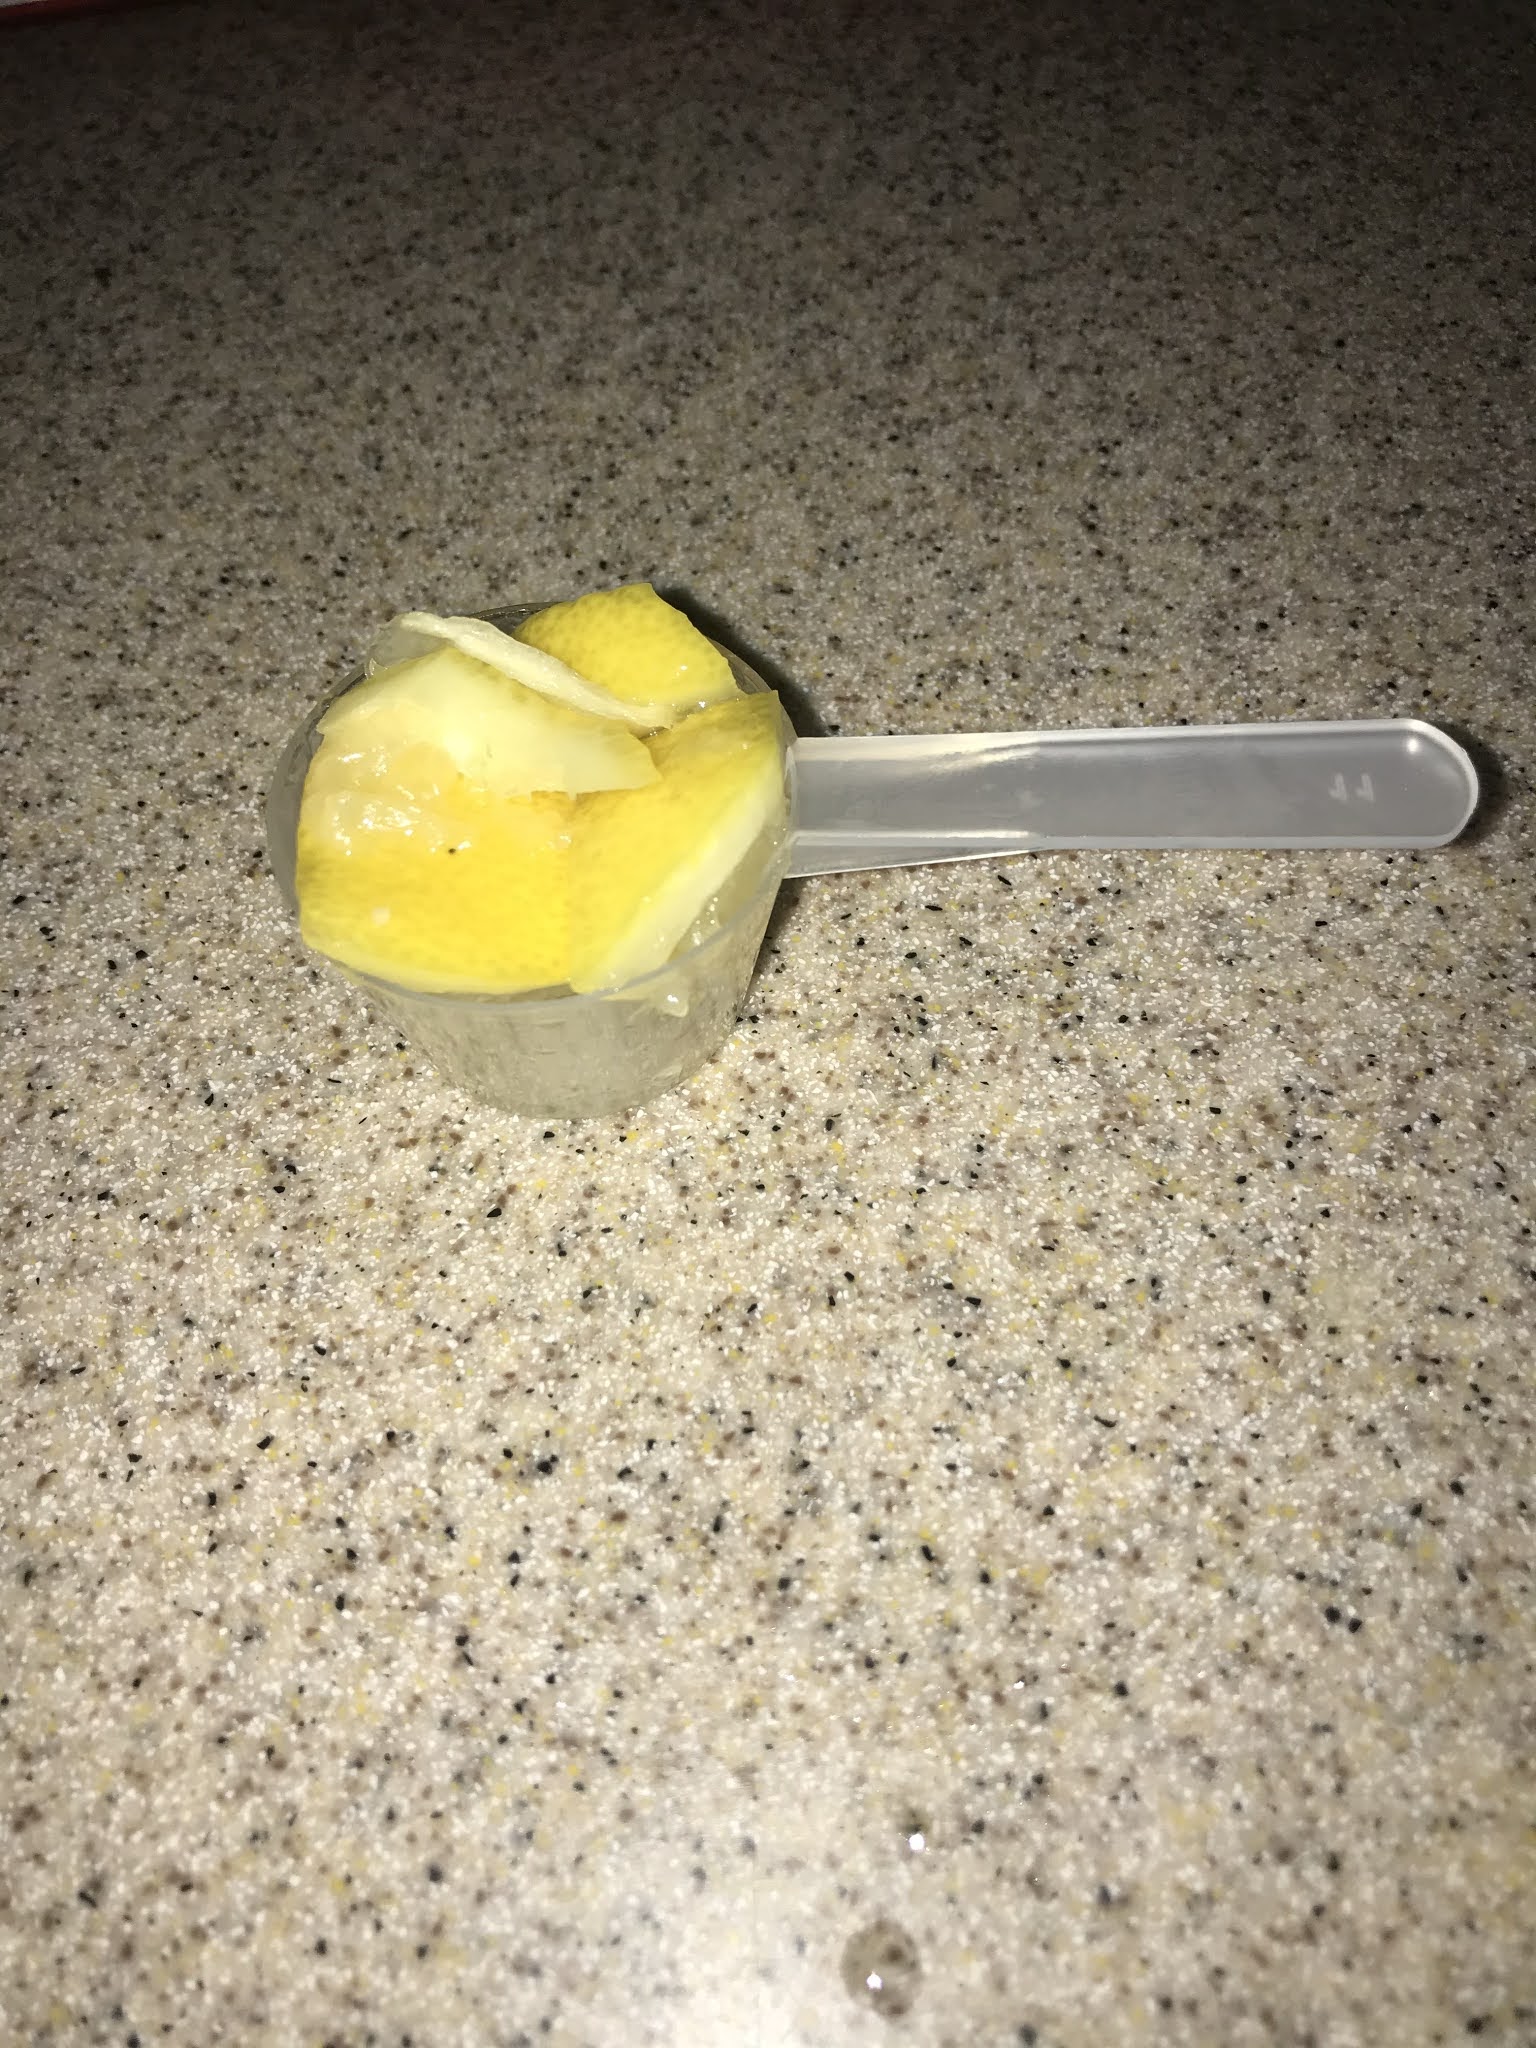
3.) Lemon 1.2 - this starter contains two scoops of flour, two scoops of dechlorinated water, and one scoop of lemon.
The lemon I used for this starter came from ALDI Grocery Store. I don't know exactly what type of brand it was, but I also purchased it on Saturday, August 22nd, 2020, so it's been in my cabinet for a week. I'm also assuming it was starting to get slightly old because the cabinet that I kept the bag of lemons in started smelling a little bit like vinegar and that scent definitely wasn't present before I put the bag of lemons in there.
A sour patch - When scooping out the piece of lemon I planned to use, I was definitely more gentle than I was with the peach. However, no one wanted this lemon when I was finished with it, so it sadly made its way to the garbage can.
A scoop of lemon - I once again packed the fruit in as tightly as I could, but this time, I wasn't able to fully compress it as well due to the fact that the peel was firmer than the peach peel.
MY OBSERVATIONS
As I just started my experiment today, August 28th, 2020, I don't have too much data on my starters yet. However, I do have pictures and descriptions of their current appearance.
THE CONTROL STARTER
This was the most liquid-y (and homogenous) of the starters I made. This was probably due to the fact that there was less solid ingredients in this starter than any of the other starters I made (and the solid ingredients in this starter were also way more broken up than the other ones).
THE PEACH STARTER
This was the second most liquid-y (and homogenous) of the starters. Since the peach was already soft when I put it in with the rest of the ingredients, it was fairly easy to stir into the mixture and it disintegrated fairly easily into the solution for the most part.
THE LEMON STARTER
This was the least liquid-y of the starters. The lemon definitely did not fully mix in with the rest of the mixture, so it made the mixture pretty lumpy, even after I spent a good amount of time mixing it. This was most likely because the lemon was much firmer than the peach, making it more difficult to stir in.
Before the mixing - This photo was taken August 28th at 8:50 PM. This is what each of the starters looked like before I mixed them together. From left to right, you can see (1) control 1, (2) peach 1.1, and (3) lemon 1.2.
After the mixing - This photo was taken August 28th at 9:14 PM. This is what each of the starters looked like after I mixed them together. From left to right, you can see (1) control 1, (2) peach 1.1, and (3) lemon 1.2.
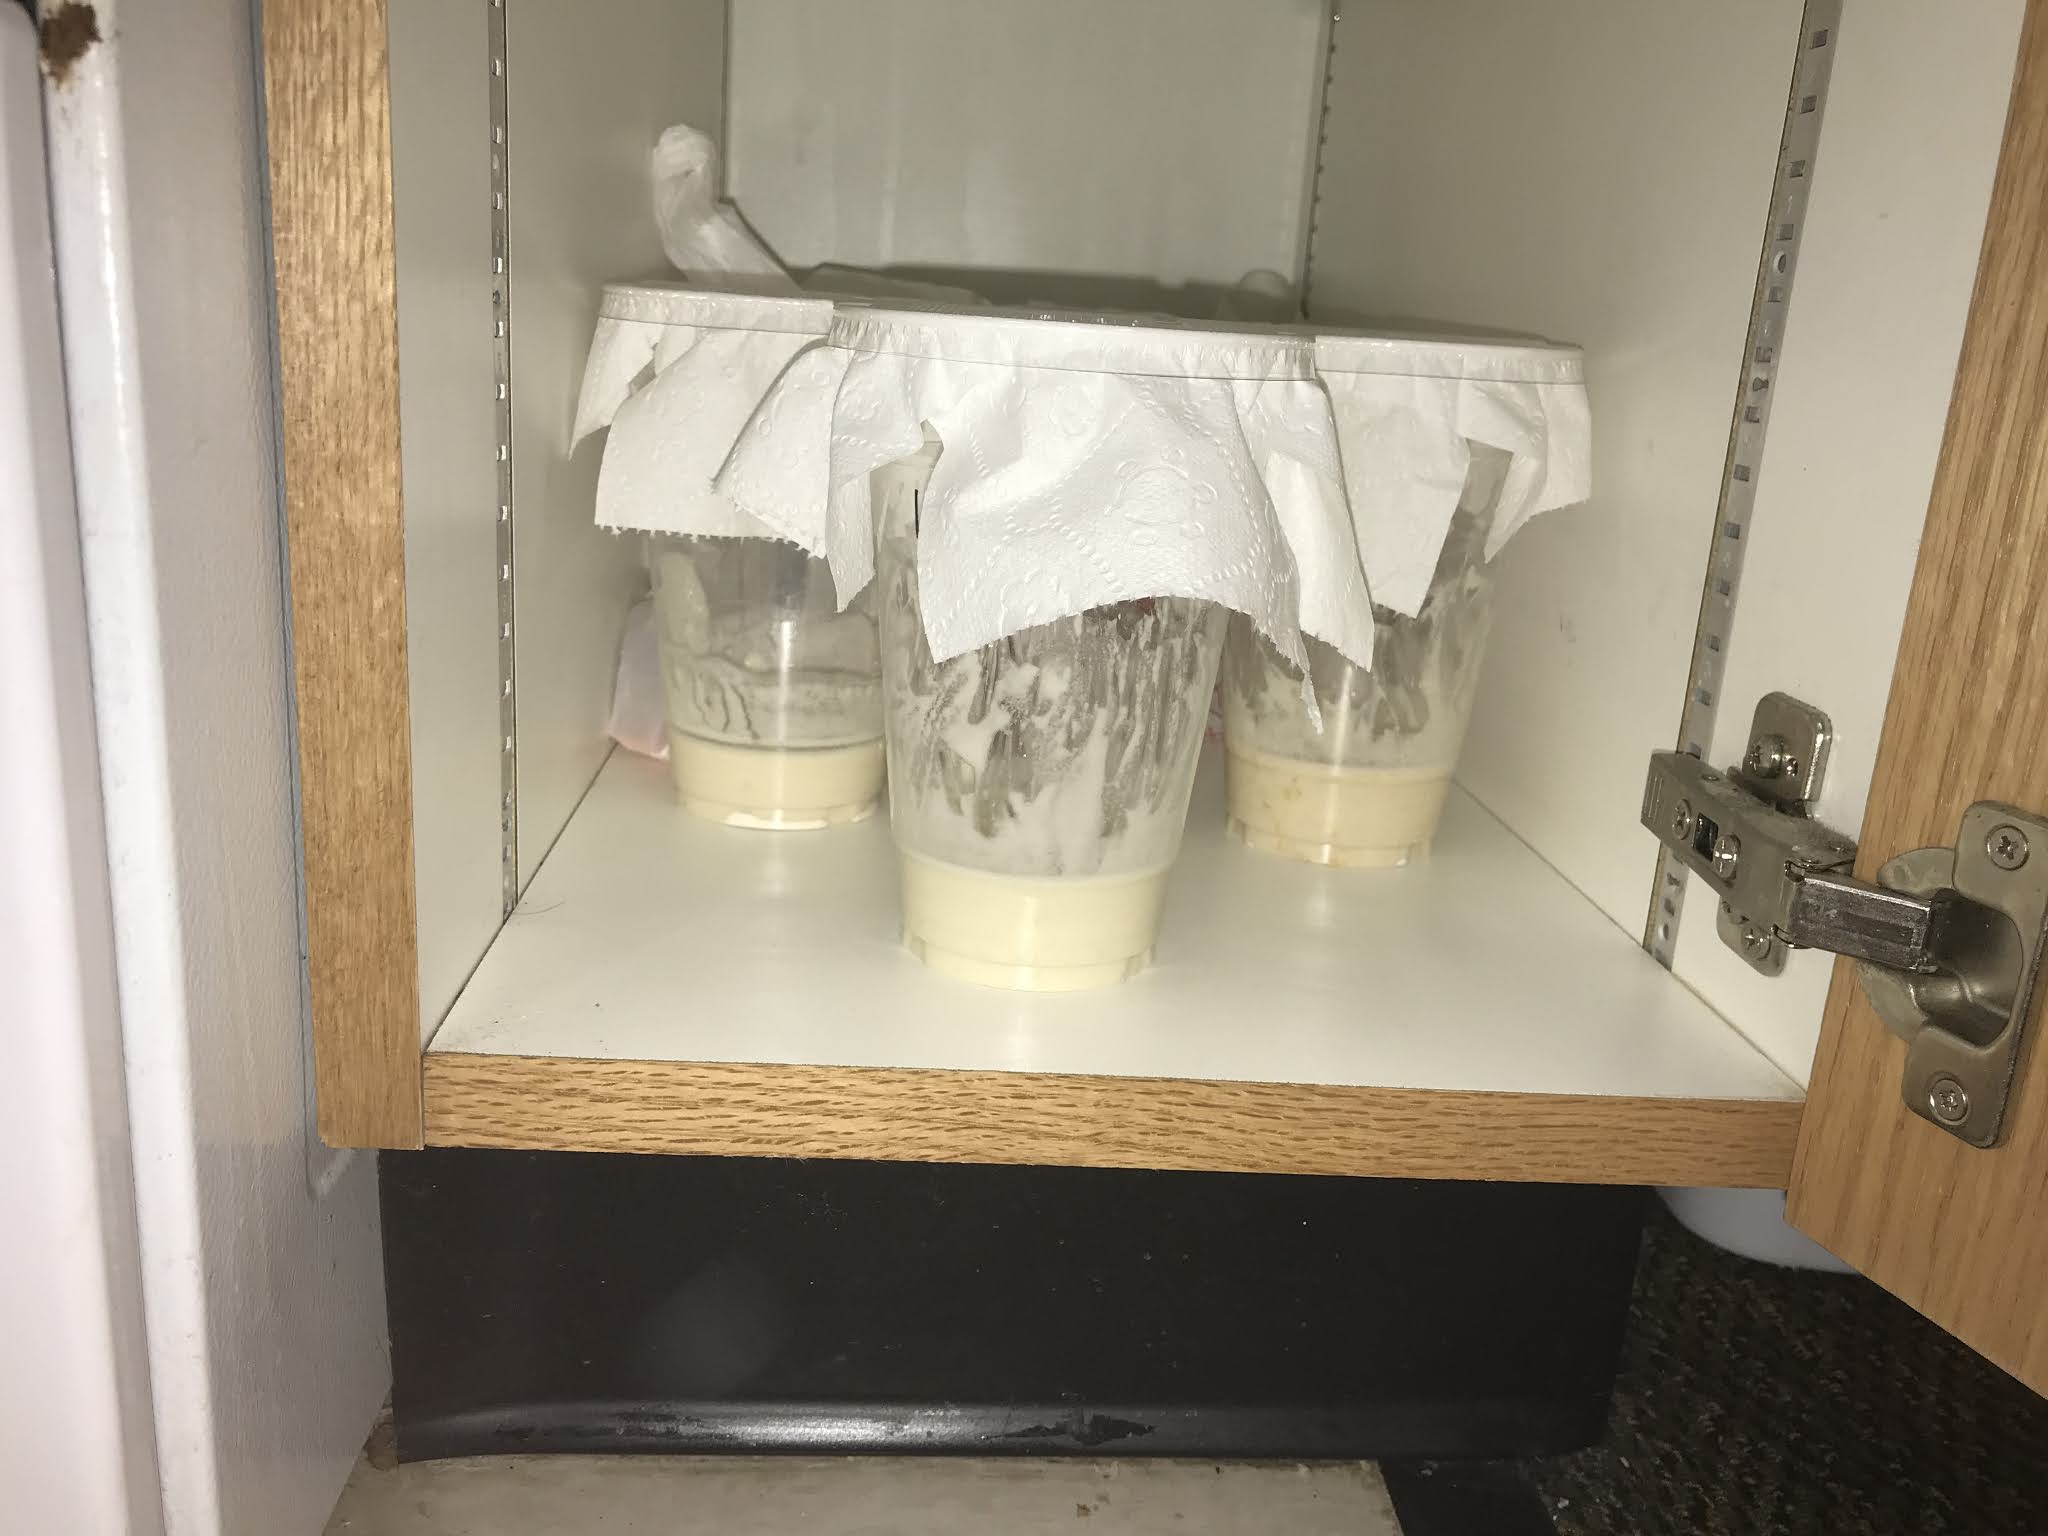
Once I completed my starters, I needed to cover them. My roommates and I have been out of paper towels for WEEKS now (we haven't been able to find any in stores), so I was originally going to use some McDonald's napkins we had as a substitute. However, my roommate's bacon found their way to them before I had the chance to warn her, so I searched around the apartment for something else and finally decide to go with a toilet paper substitute.
Toilet Paper for Paper Towels - This photo was taken August 28th at 9:21 PM. I used two layers of toilet paper and layered them over each other to ensure that the tops of the cups were fully covered.
After I finished covering the cups, I placed them in their new home: a mostly empty, dark cabinet in my apartment's kitchen, where they will sleep until I feed them again tomorrow.
The starters find a home -
This photo was taken August 28th, 2020 at 9:24 PM. My three starters find a home where I used to just keep the rest of my genetics' lab supplies until I started my experiment.
WORKS CITED
Author's Note: I'm Calyssa Stevenson and I'm currently a second-year student at North Carolina State University, studying Horticultural Science. This blog is meant to serve as a way to document my sourdough journey for my Genetics Lab. I'm very excited to see what comes of my sourdough starters in the future! Thank you so much for reading! :)


Comments
Post a Comment